Installation
In this article we will dive into the details of AAM Protected Media Files installation process. If you do not consider yourself a tech-savvy person, please do not get intimidated by the snippets of the code and screenshots in this section. Just follow the instructions and stay cool. You are just 30 minutes away from accomplishing your objectives. So don't give up.
It is important to follow all the installation steps as outlined in this section. We've done our best to explain in greater detail every single step and why it is required. Please take your time to read it all through and truly understand what you are doing.
Please also note that the material below focuses on defining access controls to files that are located in the /wp-content/uploads directory. However, with the same approach, you can set up any directory on your server.
Video guide
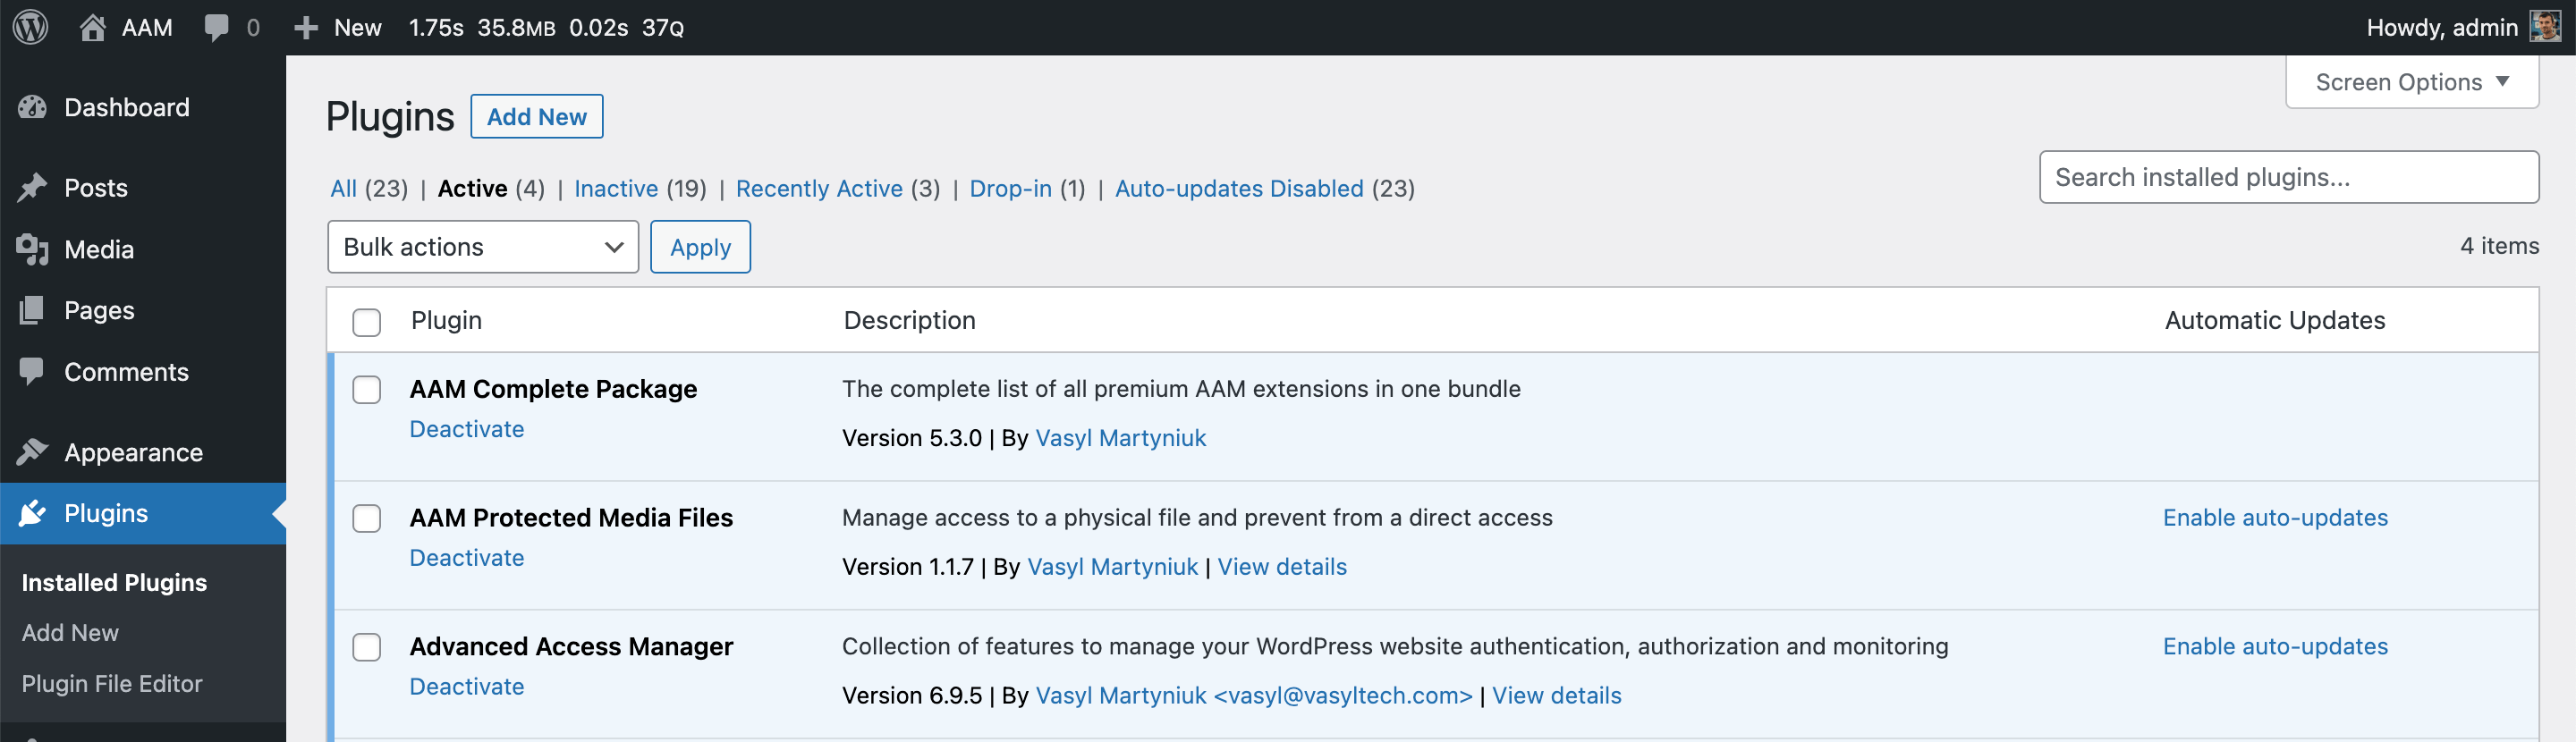
Activate the plugin
We already mentioned in the introduction article, the "AAM Protected Media Files" is the add-on to the free Advanced Access Manager plugin. Please make sure that you have both plugins downloaded and activated on your WordPress websites.
Verify that both plugins are active on the Plugins page.
Setup server redirect rules
This step is crucial as it configures your server (that owns all your website files) to redirect direct access to physical files to the AAM access handler. It is required to set up the redirect correctly. Without it, nothing else really matters.
Why does redirect matter?
All files in your website root directory (aka folder), and all sub-directories, can be directly accessed with a URL. For example, file /wp-content/uploads/logo.png can be seen by typing the URL https://yourdomain.com/wp-content/uploads/logo.png.
The only way to protect your physical files from direct access is to set up redirect rules that signal your server to route all requests to physical files to a special program that checks if the current requester has access to a file.
Below we focus on the two most popular server engines - Apache and Nginx. If your website runs on a different server, you might want to consult with your hosting provider on how to set up redirect rules that are equivalent to those below.
Apache
Go to the root of your website and open the .htaccess file. Copy & paste the following configurations at the beginning of the file.
Note!
It is very important to insert these configurations at the beginning of the .htaccess file to eliminate any chance for other redirect rules to suppress AAM rules that manage access to your files.
# BEGIN AAM Media Access Control
<IfModule mod_rewrite.c>
	RewriteEngine On
	RewriteBase /
	RewriteCond %{REQUEST_FILENAME} -f
	RewriteCond %{REQUEST_URI} wp-content/uploads/(.*)$
	RewriteCond %{REQUEST_URI} !\.(css|js|php)$
	RewriteRule . /index.php?aam-media=1 [L]
</IfModule>
# END AAM Media Access Control
Note!
The above redirect rules exclude files with .css, .js and .php extensions to take into consideration plugins and themes that store dynamically generated files in the uploads folder.
If your website root is located in a subfolder, for example, https://mywebsitedomain.com/wordpress, then adjust the RewriteBase and RewriteRule rules accordingly.
# BEGIN AAM Media Access Control
<IfModule mod_rewrite.c>
	RewriteEngine On
	RewriteBase /wordpress
	RewriteCond %{REQUEST_FILENAME} -f
	RewriteCond %{REQUEST_URI} wp-content/uploads/(.*)$
	RewriteCond %{REQUEST_URI} !\.(css|js|php)$
	RewriteRule . /wordpress/index.php?aam-media=1 [L]
</IfModule>
# END AAM Media Access Control
Nginx
The Nginx server works in a slightly different way than Apache when it comes to redirect/rewrite configurations. While Apache dynamically checks for .htaccess files in each directory (folder), Nginx has a configuration file(s) that a loaded once during server startup. This is one of their main claims for being faster than the Apache server.
Depending on a hosting provider, you may or may not have the ability to manage Nginx redirect/rewrite rules. However, the principle is simple – based on the relative location of your desired folder, you need to make sure that all requests to physical files are redirected to index.php?aam-media access control handler.
Below is an example of configurations that are identical to the Apache configurations mentioned above. You can change them depending on your specific project needs.
location ~* ^/wp-content/uploads/(?!.+\.(css|js|php)$) {
    rewrite ^(/wp-content/uploads/.*)$ /index.php?aam-media=$1 last;
    return 307;
}
Note!
The above redirect rules exclude files with .css, .js and .php extensions to take into consideration plugins and themes that store dynamically generated files in the uploads folder.
Custom file structures consideration
If your WordPress website does not adhere to default file structure (e.g. you are using Bedrock), it is most likely that you need to do some additional setup to properly configure AAM behavior.
For more information on this, refer to How to protect WordPress files with a custom file structure? Q&A.
Verify file redirects
To verify that directly accessed files are served through the AAM Protected Media Files plugin, you have to make sure that the WP debug mode is enabled.
In short, go to your website's root directory and open wp-config.php in an editor of your own choice. Search for the WP_DEBUG constant and set it to true (if not already set).
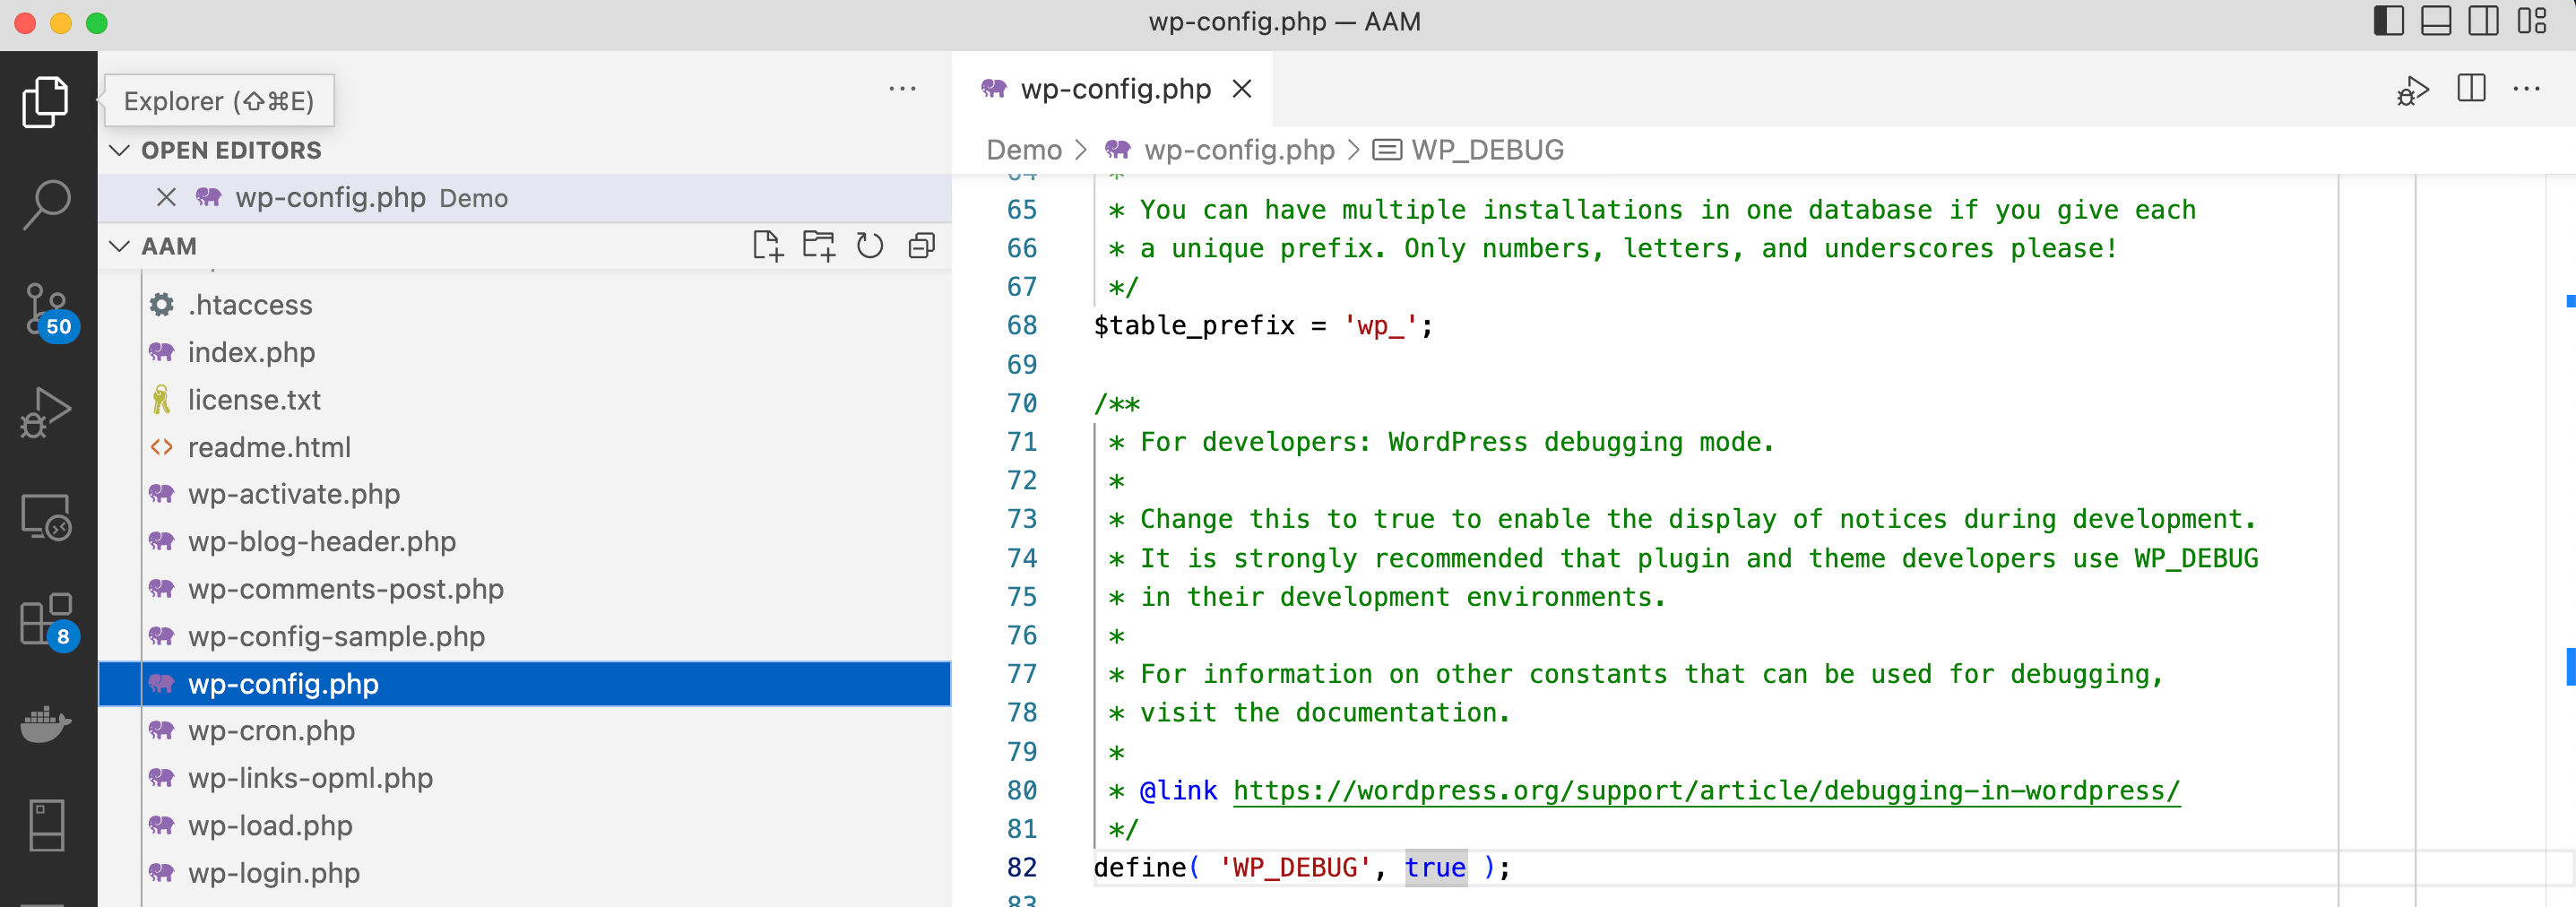
Important!
If this is your production server, make sure that you remember to set the WP_DEBUG mode back to false.
From here, pick any file from the /wp-content/uploads directory (or any other directory you restrict access to) and open in your browser the "Developer Tools". Various browsers have it named differently but essentially this is a developer panel that allows you to inspect your page or HTTP requests.
If everything is set up correctly, the "Response Headers", for the requested file, should contain the X-Served-By header with the AAM Protected Media Files value.

Conclusion
While the installation process for AAM Protected Media Files may initially seem intimidating, especially for those who aren't tech-savvy, this article has provided a comprehensive guide to make it more accessible. It is crucial to meticulously follow all the outlined installation steps, each of which has been elaborated on to underscore its significance in successfully implementing AAM Protected Media Files on your WordPress site. Additionally, it's worth noting that the principles discussed here can be applied to secure any directory on your server.
Moreover, we've included a video guide to complement the written instructions, catering to various learning preferences. Ensure that both the AAM Protected Media Files add-on and the free Advanced Access Manager plugin are downloaded and activated on your WordPress website before proceeding with the setup.
One of the critical steps involves configuring server redirect rules, a fundamental aspect of safeguarding your physical files from direct access. Whether you're on an Apache or Nginx server, our clear instructions and code snippets facilitate the process.
Lastly, verifying file redirects is emphasized to confirm that directly accessed files are routed through the AAM Protected Media Files plugin, and enabling the WP debug mode is pivotal for this verification.
With patience and attention to detail, you can secure your media files effectively and maintain precise control over access, even if you're not tech-savvy. Remember, you're only 30 minutes away from achieving your objectives – so don't be discouraged.
 Virtual Assistant