Managing JWT tokens for WordPress
In the world of web development and content management, user authentication plays a pivotal role. One of the most talked-about and widely utilized methods for user authentication today is the use of JWT tokens. These tokens are instrumental in enabling seamless cross-system integrations. Given that WordPress stands as the most popular content management system (CMS) globally, it comes as no surprise that JWT authentication has emerged as the top choice for custom development and inter-system integrations in the WordPress ecosystem.
JSON Web Token (JWT), as described by the IETF specification, is a compact and URL-safe way of representing claims that can be exchanged between two parties. In this concise article, we'll provide you with fundamental knowledge you need to effectively implement JWT tokens using the free version of the Advanced Access Manager WordPress plugin.
Prerequisites
Before diving into the intricacies of JWT authentication with AAM, it's essential to note a couple of prerequisites:
Familiarity with JWT. We assume you have a basic understanding of the JWT concept. If not, we recommend taking some time to acquaint yourself with it. The JWT concept is relatively straightforward and can be mastered fairly quickly.
WordPress and AAM. You should already have a properly installed WordPress instance with the AAM plugin in place.
Now that we've covered the prerequisites, let's outline the big picture of all the components involved.
Understanding the JWT authentication flow
At its core, JWT authentication serves to authenticate an HTTP request to a WordPress website. When a JWT token is transmitted correctly, it effectively communicates to the website's core, saying something like, "Hey, I'm Joe, and here's my identification (a JWT token) issued by a trusted party."
It's crucial to understand that a JWT token does not authorize specific activities. In other words, it should not be used to implement code that allows or denies specific actions, such as creating a post, deleting a user, or updating settings. Authorization for such actions should be controlled based on the account that the JWT token represents, a topic we'll delve into later.
Here's a high-level diagram illustrating how this JWT authentication process works:
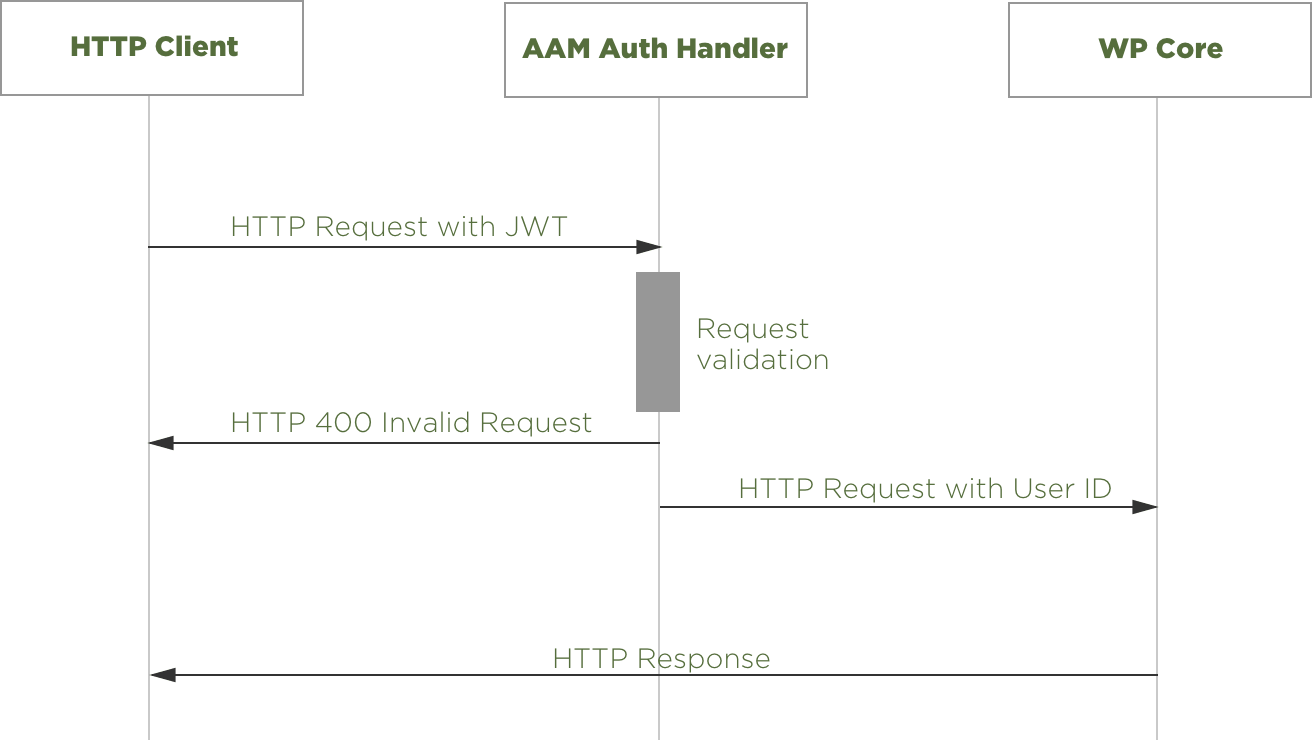
- The HTTP Client (e.g., user's browser, application, Postman, Swagger, etc.) sends a request that includes a JWT token.
- The token is validated by the AAM Auth Handler.
- If the token is valid, AAM delegates the authenticated request to the WP Core for further processing.
Since the JWT token is associated with an active website account, you can effectively manage access to the website's resources and actions for that specific account. AAM offers numerous features that allow you to define granular access as needed. To adhere to enterprise-level security standards, you can utilize access policies and attach them to any user.
However, it's important to note that the validity of a JWT token doesn't guarantee its successful use, as the associated account may no longer be active or the token may have been revoked.
Now that we've established the fundamental concepts, let's explore how to manage JWT tokens using AAM's user interface (UI).
Managing JWT tokens with AAM UI
The free version of AAM provides an intuitive user interface for managing JWT tokens for individual users. To get started, navigate to the AAM page and select the desired user. You'll notice the "JWT Tokens" tab in the Main area.
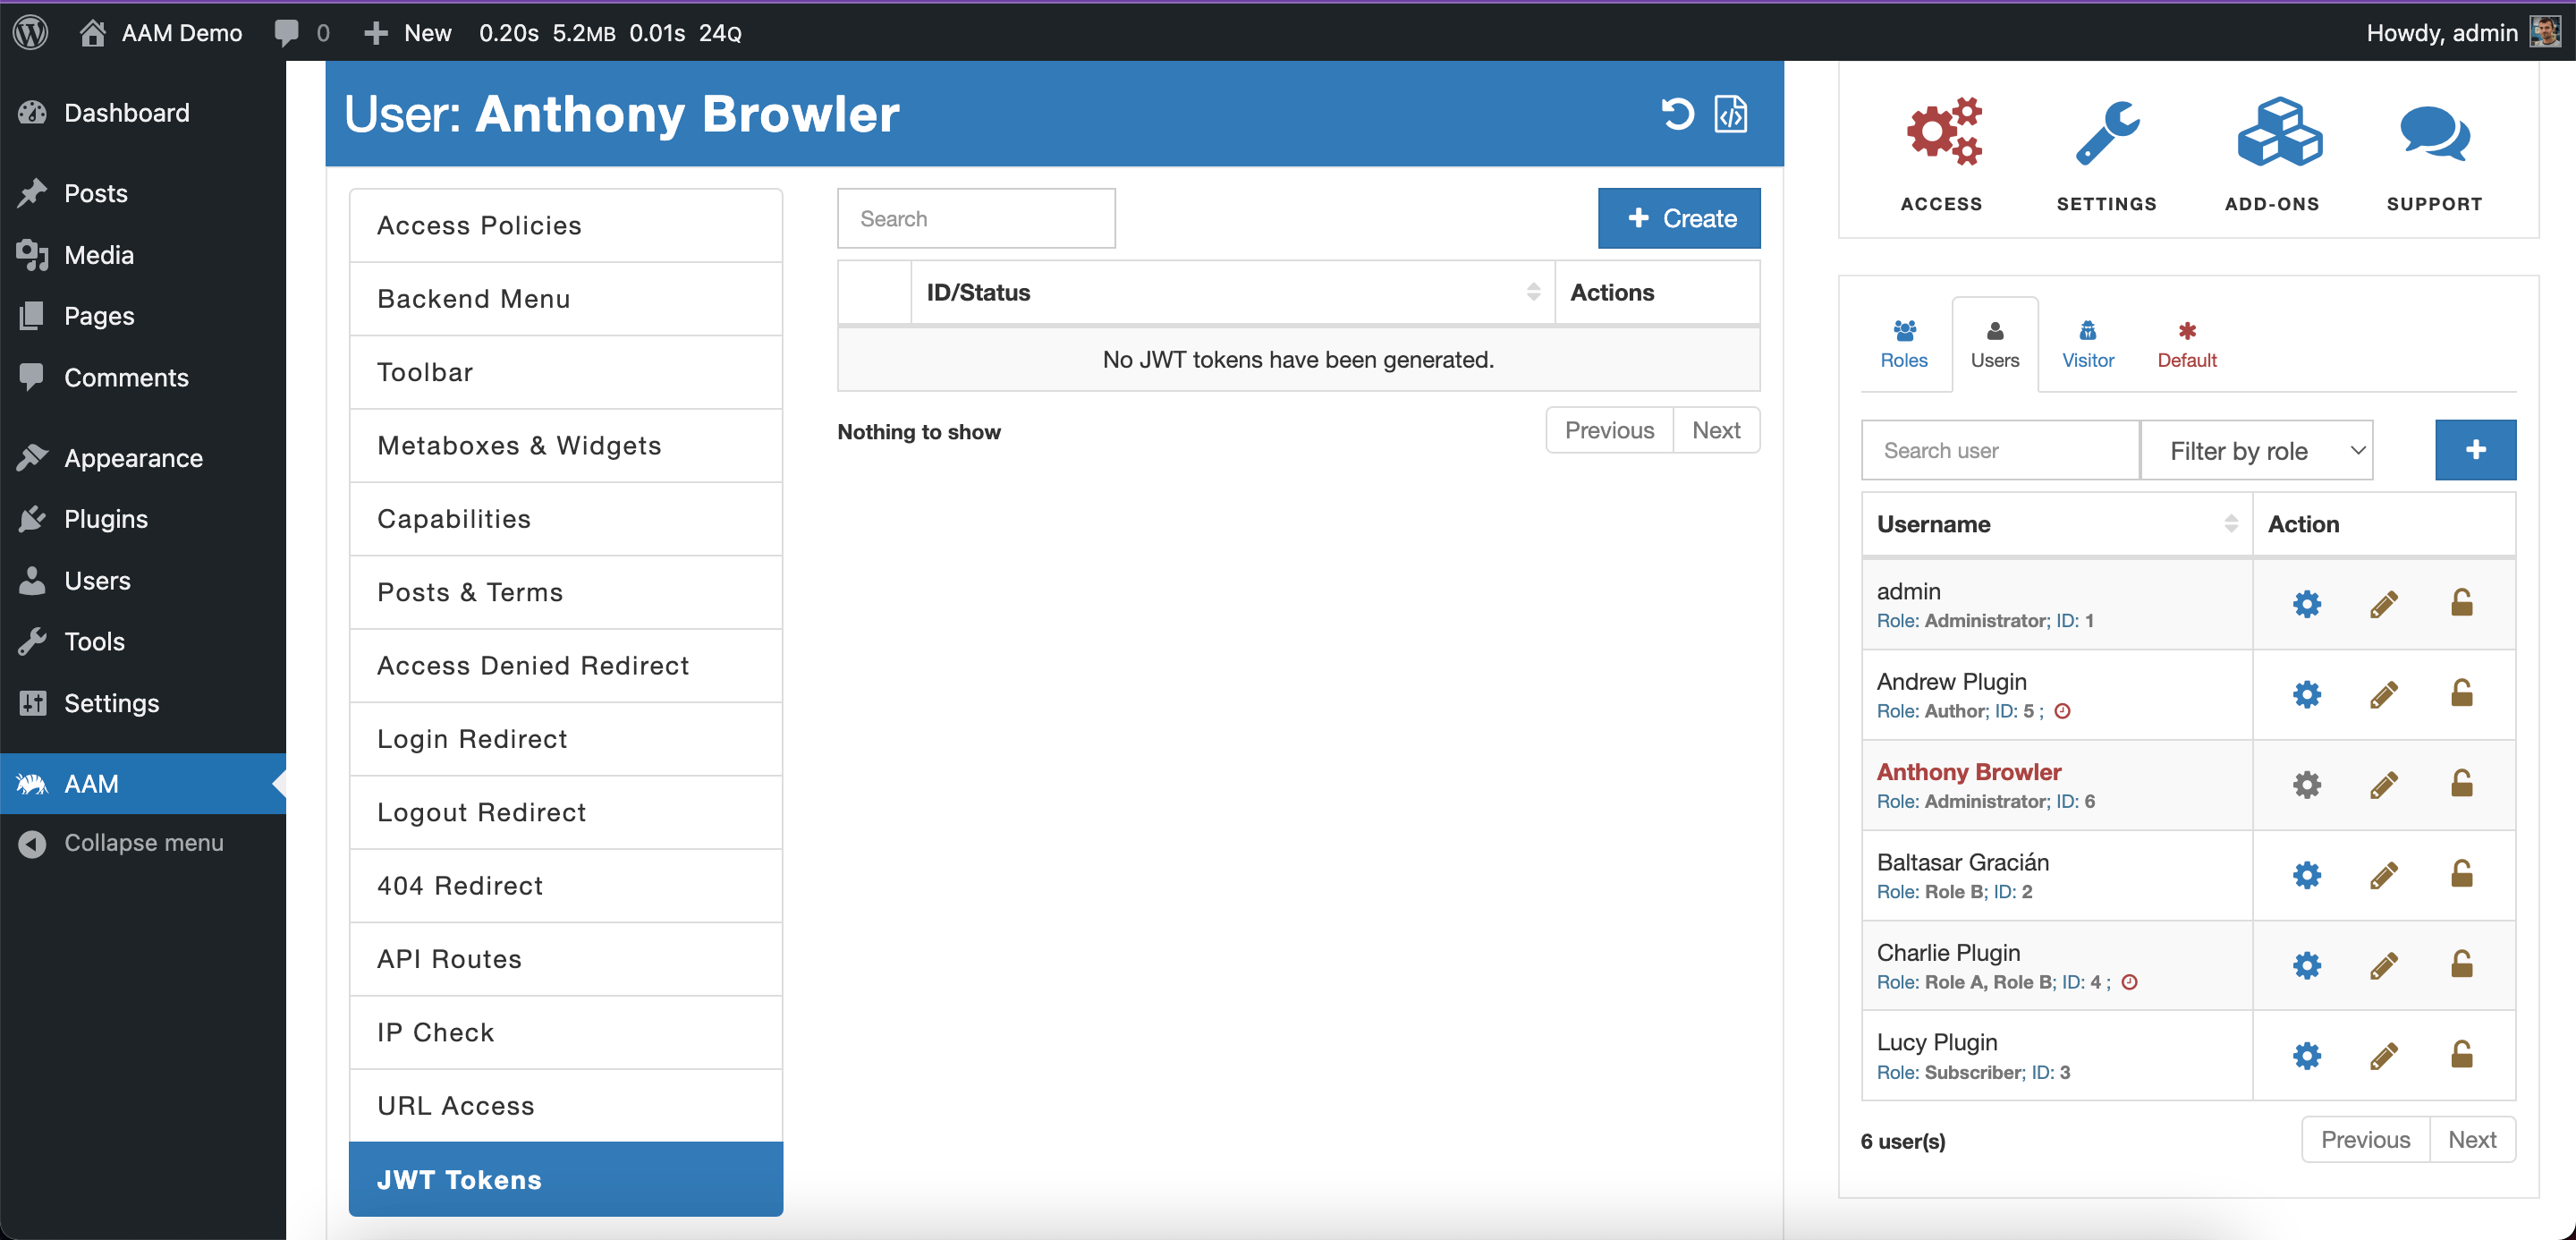
On this tab, you can perform the following actions:
Creating JWT tokens. You can issue a new token by clicking the "Create" button. This action opens the "Create JWT Token" modal, which offers three distinct settings to customize the token's properties:
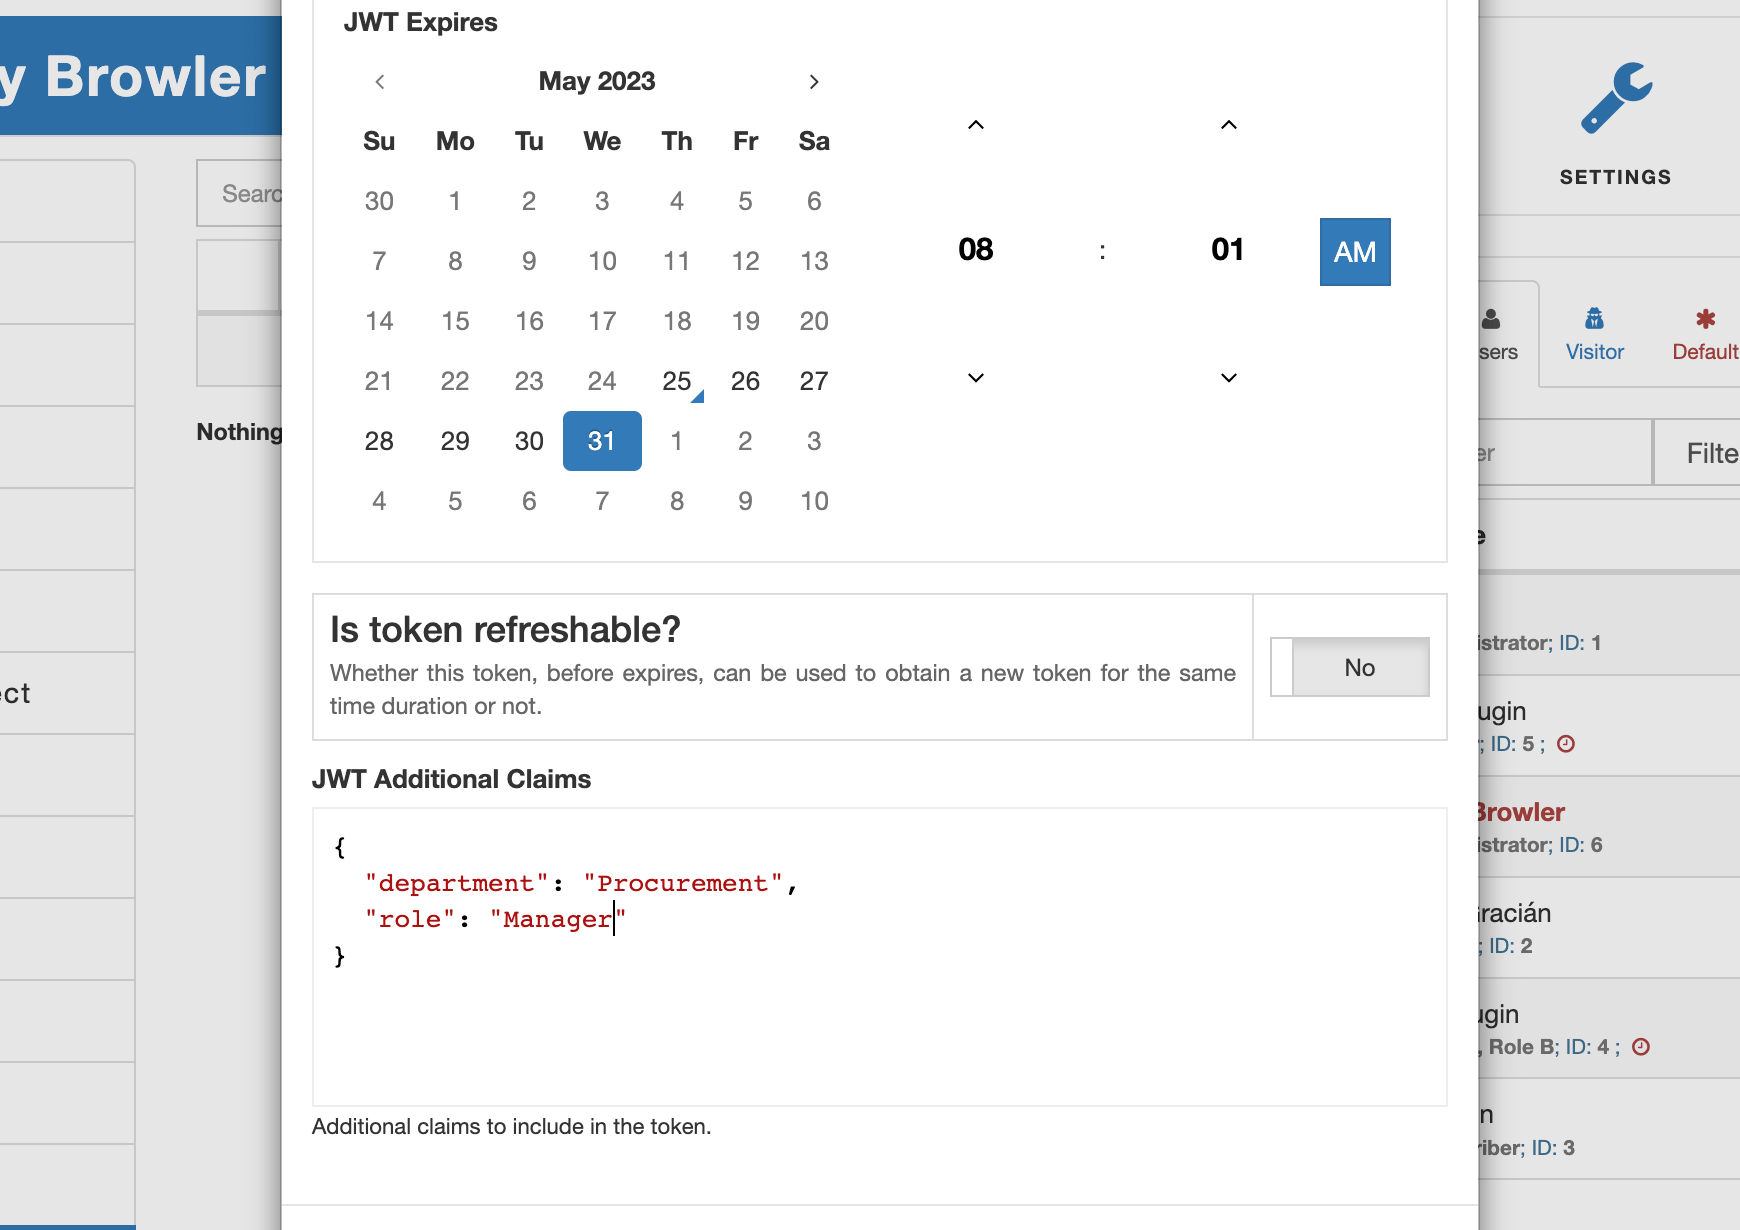
JWT Expires. This component allows you to specify the token's expiration time (TTL) in the future. By default, the issued token expires in 24 hours.
Refreshable. The "Refreshable" flag determines whether the issued token can be used to obtain a new token before the original one expires. This approach differs from the OAuth 2.0 standard, where only the "refresh token" can be used to obtain a new JWT token. AAM simplifies this process by allowing the use of the same token for refresh purposes.
JWT Additional Claims. This component provides the flexibility to include custom claims in the token. You can input a valid JSON object, ideally a concise one to prevent excessive token size.
AAM stores the list of all issued tokens separately for each user in the wp_usermeta database table under the name wp_aam_jwt_registry. This storage is referred to as the JWT token registry, and its size is determined by the service.jwt.registry_size ConfigPress option. By default, each user can store up to 10 tokens, but you can easily adjust this number as needed using ConfigPress.
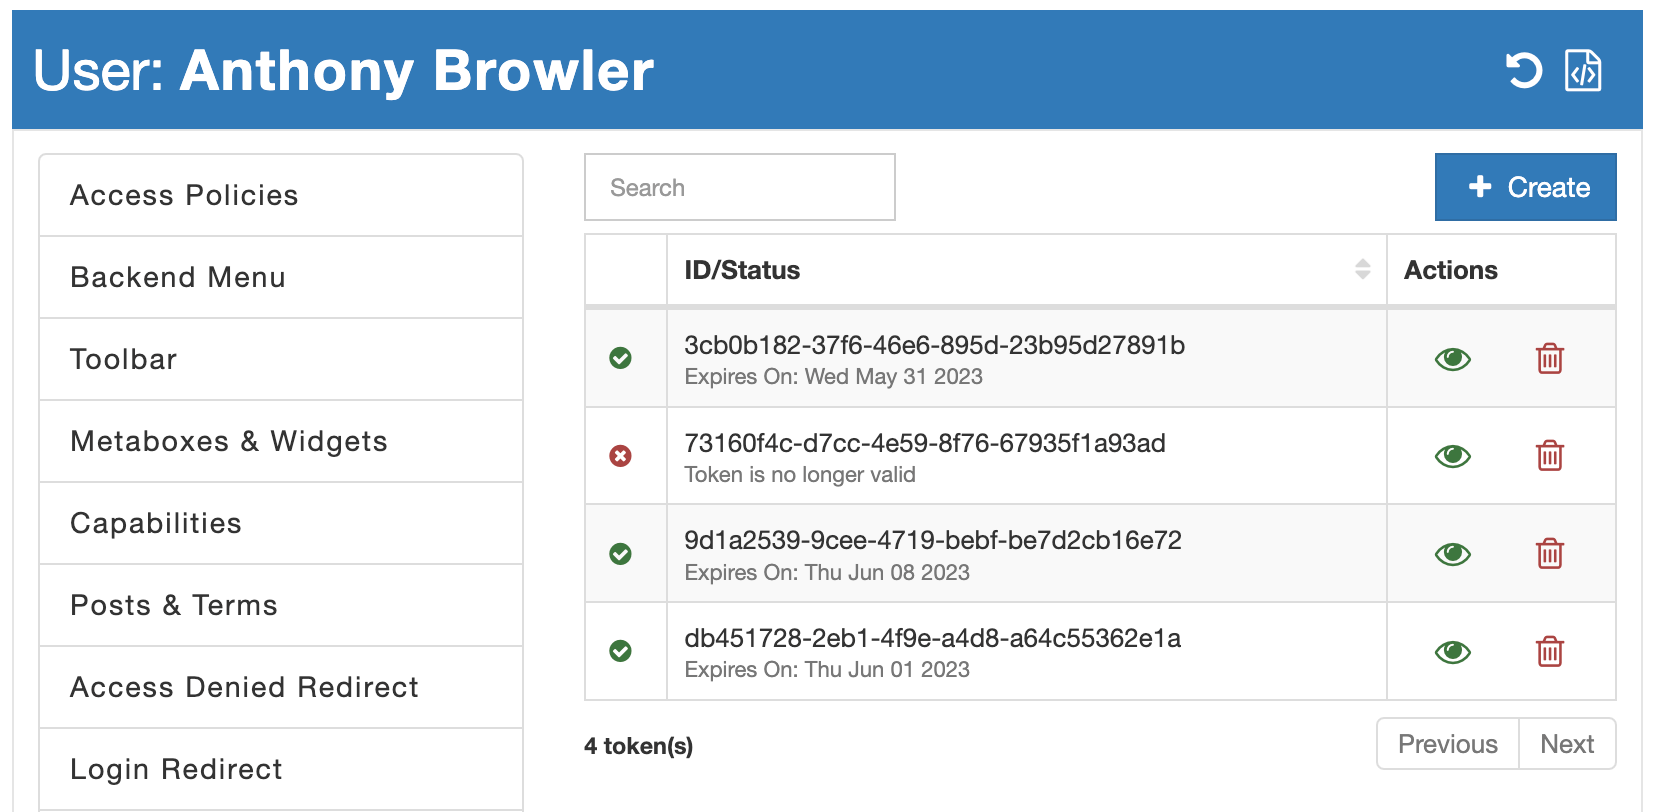
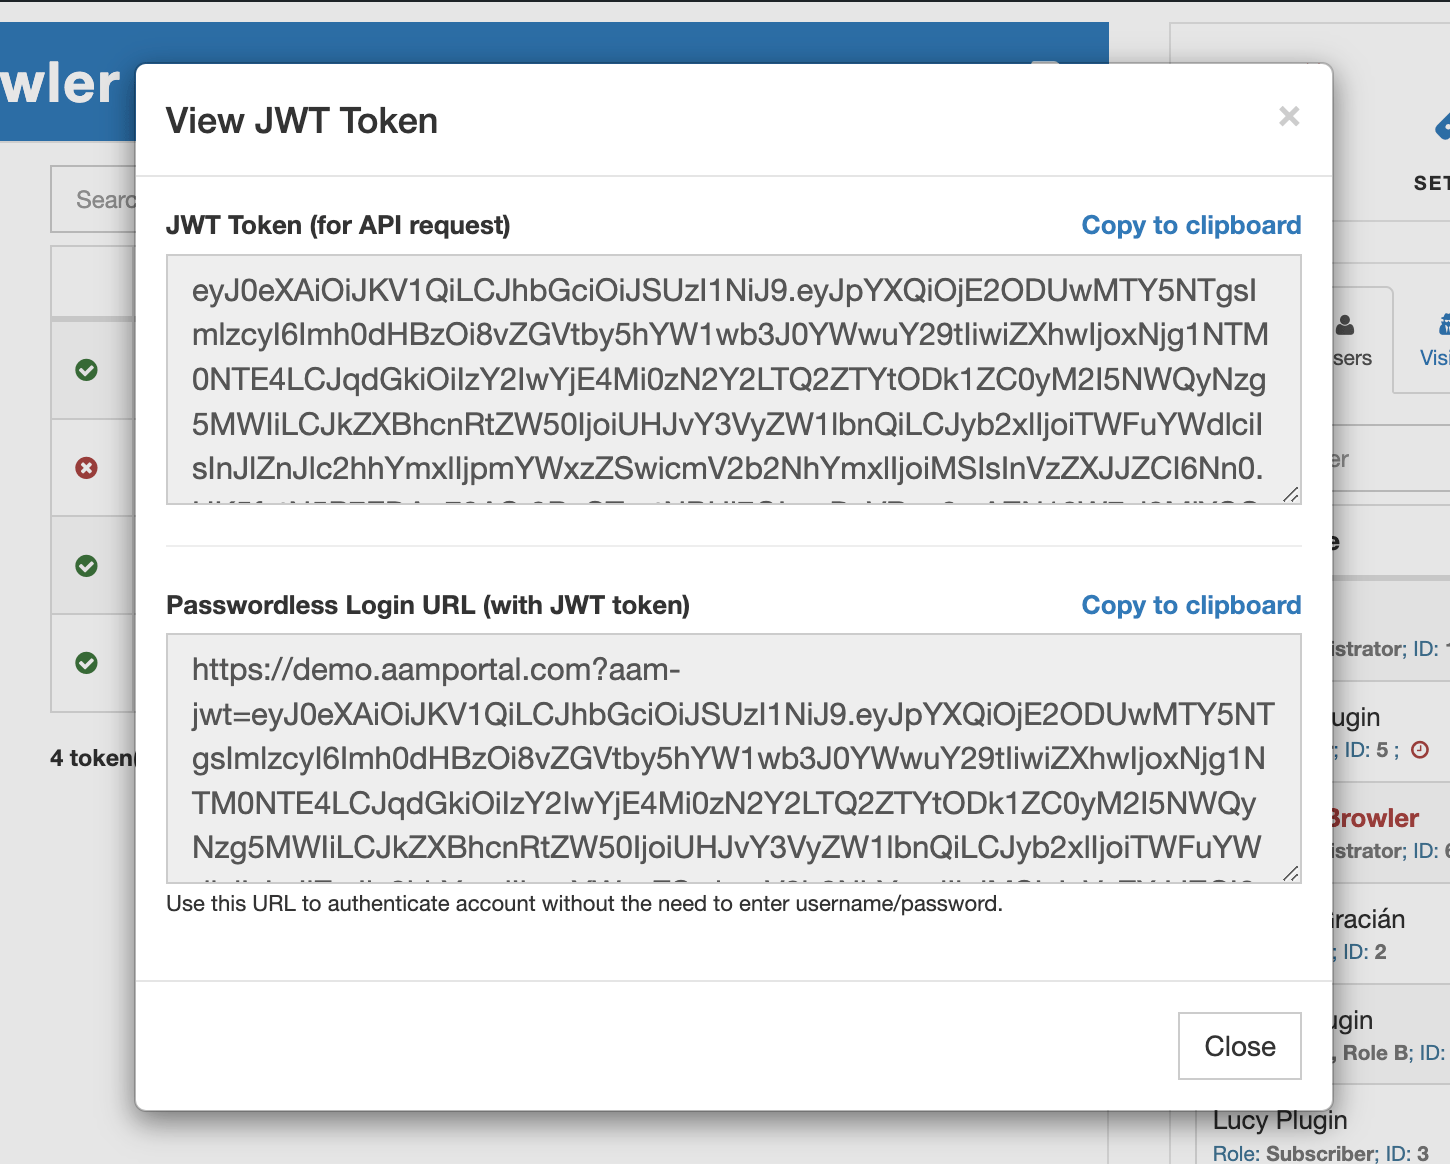
The token list provides essential information about each token, including its expiration date, token ID, and a visual indicator of its validity. Two actions are available: "View Token" and "Delete Token," allowing you to preview token details or delete a token, respectively.
When you select the "View Token" action, a modal displays the raw token and a signed URL. This signed URL serves as a passwordless login link that can be shared with users as an alternative to a username/password pair.
Conclusion
JWT authentication is a powerful method for securing your WordPress website and enabling seamless user access. By leveraging the Advanced Access Manager (AAM) plugin, you can efficiently manage JWT tokens for individual users, customize their properties, and maintain strict control over access to your website's resources and actions.
 Virtual Assistant